AppliCad’s unique Metal Block-Cutting process is the most effective waste reduction system for metal roof panels in the world. Most often, the so-called ‘waste’ from offcut material can be reduced to zero – yes, ZERO waste. Block-cutting means you can effectively use all suitable offcut material on the roof instead of throwing it into the trash. You can explore various options on your computer to get the best result, all without risking the margin on a job by cutting the wrong material. More importantly, your installers can fit the roof the way you determined would give the best result – saving time, saving material, saving money – increasing profit on your job.
Block-Cut = Zero Waste
As a further development of the long-established ‘Auto-Blocking’ process, Block-Cutting allows the estimator to determine where roof sheets/panels go and more particularly, shows where the offcuts must go, as part of a block, to substantially reduce waste material.
Save Hours on a Job
Saving labour and material means you get a higher profit margin per job. Each cut of a single panel gives you two panels. You can imagine that over a big cut-up roof, this time adds up very quickly and can save hours on a job.
This Block-Cut process is taking what roofing installers (at least those who reduce waste by flipping sheets around) actually do in the field and shows them exactly how to achieve the best fit before they get to the job site. It is an interactive process that is ‘driven’ by the operator to get the required result.
How the Block-Cut Process Works
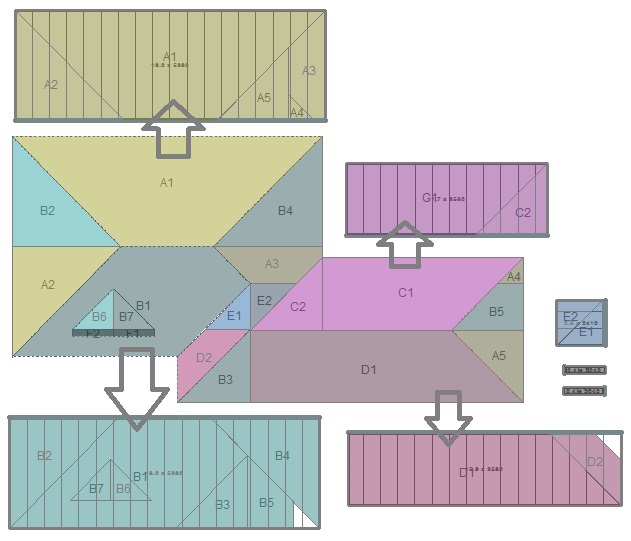
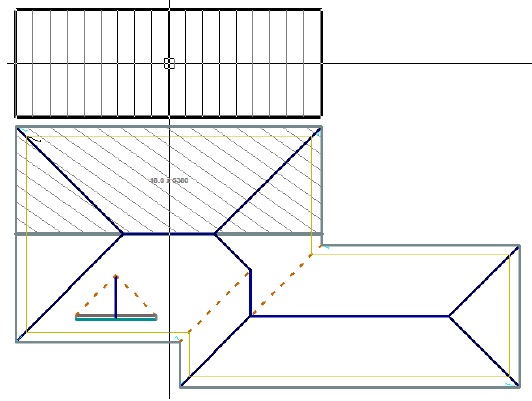
Assign roof planes to blocks and select the roof section you want to be called A1.
Repeat until complete.
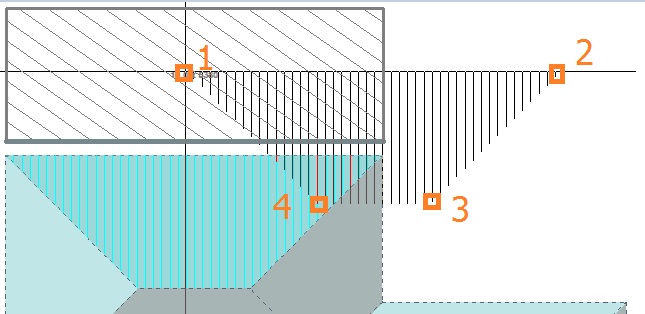
Using interactive functions – Assign roof planes to blocks and by selecting one side of a split line and using F1 or F2 to rotate the block-piece until it fits in place on our block, taking note of the pane lay direction indicated by the hatch lines.
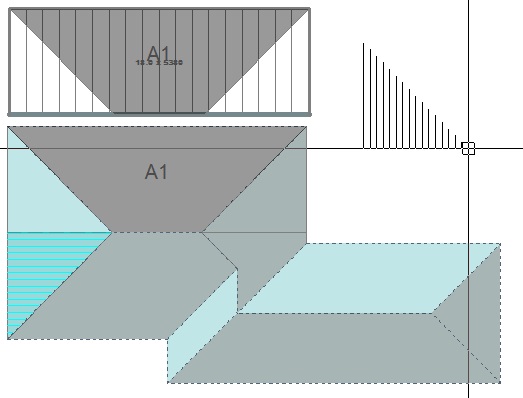
Split the hip end at the right using split plane at point, so that two areas are created to reveal A4 and A5. Now assign the 2 planes you just created to Block A as A4 & A5.
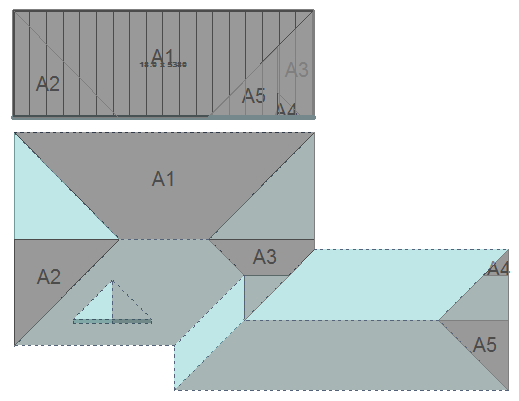
Repeat for other areas of the roof until you have assigned all planes to a block, and that’s it. Place the Block-Cut legend onto the model, and you are ready to print the report and send it to your customer.
A caution…
Note that there may be multiple ways to get a similar result – 10 estimators could get 10 different results, so practice this until you know that you are getting the best result for your team. Engage with the installers and discuss options and understand how they work, so that you meet their needs.